Ever tried putting on full makeup and skipped the blush? “Pale” is the word that jumps into my mind every time I look back at my photos when I used to think it was just an add-on.
Between the overly sun-kissed look and the Victorian-age-like paleness, I gave up on using blush altogether at some point, which was another fatal mistake!
Blush is that one makeup component that can make your cheeks look naturally vibrant and healthy. You can’t just skip it and hope for your cheeks to glow on their own.
Yet, it’s not something you just swipe on your face; there are rules to applying blush, and I’ve learned them the hard way (gathering the ashes of my old photos).
Before you go buy a blush and get it on your cheeks, questions like “how to put on blush” and “what color blush should I wear” need to be answered, and I’m here to do just that. So continue reading while I share my little face-flushing experience with you.
What Is the Meaning of Blush?
Everyone can blush naturally, right? Well no! I don’t blush, and neither do many girls.
Blushing itself is a natural reaction in the body. When you get shy, embarrassed, or stressed, the body releases adrenaline, signaling the heart to increase its beating rate and thus overflowing the blood vessels in your cheeks with blood. That’s what causes your cheeks to redden and add a bit of kilig to your face, especially if you have light skin.
Since blushing adds to the feminine charm, people started to wonder how to make a face hold that pretty flush without an actual stimulus, and that’s how the idea of makeup blushes came. Precisely, the first to make a makeup blush were the ancient Egyptians using red ochre pigment.
Saving this history lesson for another time, now blush is made from soft pigments and formulated as creams or powders. Let’s delve into what these two types are:
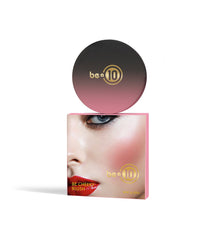
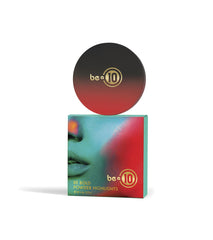
Powder Blush
Powder blush wins in the categories of versatility and variability. It comes in endless colors and shades, and you can use it to achieve any type of look you desire, whether it’s a matte look for mornings or a glowing one for a night out.
It looks good on the bare face if you prefer minimal makeup (just add a layer of primer or a glow-enhancing lotion to give it something to stick on). However, it works best over foundation, creating a warm flush that feels like it’s breathing life into your cheeks.
Since it’s easier to apply, I always recommend it to beginners until they get the hang of the process. Really, minimal mistakes can happen when applying powder blush, and that’s a good thing to have.
However, it’s important to consider the type of your skin when choosing a blush type, and taking that into consideration, powder blush is suitable for the two extremes: oily and dry skins.
For girls with oily skins and faces that tend to sweat a lot, powder blushes would be perfect as they soak up the oil from the skin and dampen this shiny appearance. You might think that makes them unfit for dry skin, but it’s actually the opposite!
I have dry skin, and from my experience, powder blushes tend to crack less, unlike creamy ones, which dry on my face and look flaky on bad skin days.
Cream Blush
Although a cream blush won’t give you a dramatic look that a powder blush can give you, it tends to be longer-lasting without even the use of a primer or base foundation.
It also looks more natural, like flushed from within, and stays in place until you reach for your makeup remover. However, it works best for people with normal or combination skins only, as it’s neither hydrating enough for dry skins nor absorbing enough for oily ones.
You can use it on your bare skin directly but be aware that it can leave a heavy color if you overdo it. You also need to learn how to apply cream blush before using it, as it’s more complex to master than its counterpart.
How to Pick a Blush Color
The first step of knowing how to blush with makeup is to pick the right color. We all have different skin tones, and no matter what the makeup artist you’re following recommends or the last makeup tutorials you watched suggest, you’re the only one who can decide which color fits you best. Still, some guidance can help.
You need to choose a color that accentuates your features but not to the point that it makes them look edgy. While the too-dark and too-glowy options can work for a couple of occasions, lighter shades give warmer and more youthful finishes; the thing we all desire from a decent blush.
Yet, this doesn’t mean you can’t spice things up every now and then with a poppish color. Generally, the shades that go with each skin tone are:
-
For fair skin: Light pink shades flatter fair and light skin tones as they emphasize their tone without putting a spotlight on their cheeks. To liven things up in case of a night party or a special occasion, you can use light coral and peach shades, but make sure not to overdo them.
-
For light-medium skin: This skin tone tends to be more forgiving when it comes to peachy shades. For glowy morning looks, peachy-pink shades work best, while warm mauve and heavier peach can give a pop of color for the weekend.
-
For olive skin: Olive, as well as golden skins, can take deeper pink and rose shades as they complement their yellow undertone and add a hint of warmth to the skin.
-
For dark skin: Dark skins accept a wider variety of shades, including fuschia, berry, tangerine, raisin, and brown. In general, the darker the skin, the more it looks better with heavier pigments.
Where to Apply Blush
Now that you’ve known which color to pick, the question is: where does blush go? Let’s see. Girls who can’t blush naturally find it the hardest to apply these colorful powders and creams since they don’t know where their natural blush should take place on their faces.
If your skin can redden naturally, you can just follow the pattern of your own natural flush and apply the blush accordingly. But what if you don’t? No, don’t just swipe your powder-filled brush on the apples of your cheeks.
Your face shape determines your bone structure and the shape of your smile, which, in turn, affects your blush placement. According to your face shape, the blush should be applied as follows:
-
Oval: This is the easiest face shape to apply blush on. The goal is to make your blush round to oppose the angular shape of your face. Thus, apply the blush above your cheekbones, then blend with a circular motion towards the hollow below your cheeks to lift your features.
-
Round or chubby: Contrary to the previous application, the goal here is to make your blush more angular. The easiest way to do that is to smile so as to lift your cheeks, apply the blush then blend back and out towards your earlobe.
-
Oblong: You want to shorten your face so pay extra care not to make the blush reach below your cheekbones. Apply the powder or cream on the apples of your cheeks, just below the outer corner of your eyes, and move the brush in an upward motion to blend.
-
Heart-shaped or triangular: Avoid anything edgy here in order to soften the way your cheeks look. The right way to do that is to start working your blush from the tip of your ear toward the side of your cheek apples, then blend upwards. To further soften your look, blend a hint of your blush from your brow toward your forehead.
-
Square: The magic word here is “move in a straight line.” Start low at your cheekbones and move in a linear way towards the edge of your hairline. Your blending direction should be upwards only.
Tips to Apply Blush Like a Beauty Superstar
As you can see, it’s not that hard to figure out a suitable brush color and apply it according to what suits your facial features. So why is it still hard to achieve this on-point blushing look and fake this extremely appealing look of health?
That’s because there are some tricks that you only pick up along the way. While makeup artists tend to finish applying blush in a few seconds in their videos, there’s actually more to the procedure than what they show.
And because I know the struggle, here are a few things that they never tell you the first time you hold that brush and try to give your cheeks some color.
Pick the Right Brush
Actually, the brush you use can make or break your blush. A brush that’s too big won’t help you follow your cheek line, especially if you’re a beginner. That’s why a small to medium brush is the best you can opt for.
Moreover, try to go light on the bristles. The lighter the brush, the easier it’d be to blend the blush without flinging any unwanted colors below or above your cheeks. Also, a brush with fewer bristles won’t carry much powder or cream, allowing you to take your time blending without turning into a clown after a couple of strokes.
Blend It, Ladies!
Speaking of blending, this is an important step that’s always overlooked in makeup tutorials due to the sped-up videos. Blending takes time, and it’s as important as applying the blush in the right places.
When you put a blush, you don’t want it to look unnatural; quite the opposite, actually. Your natural face flush doesn’t have visible edges, and that’s how your makeup blush should be. To hide these edges, you have to blend the powder or cream for a couple of minutes to make it look like it’s a part of your skin.
In case you’re using a cream blush, a wedge makeup sponge will help eliminate any unnecessary lines, streaks, and edges on your face.
Never Overdo It
The key to applying the perfect blush is to know where to stop. Putting on much color on your cheeks can backfire, leaving you with a muddy-looking finish on your cheeks rather than a healthy look.
To avoid doing that, try to apply your blush in natural sunlight (near an open window or something). Also, make sure to tap off the excess powder off your brush before swapping it on your face.
Finally, try not to get overwhelmed by your look the moment you finish applying the blush. You’ve been looking at your face for a few minutes without any colors; it’s only natural for your eyes to think there’s something extreme on your face once you put the blush on.
To solve this problem, walk away from the mirror for a couple of minutes, then take another look. If the color still looks heavy, apply some mute powder or foundation over it. If it’s not, you’ve nailed it!
Time to Get Your Glow On!
The bottom line is you shouldn’t skimp on blush, especially after applying a full-coverage foundation. As much as these magical creams hide our blemishes, dark spots, and other imperfections, it conceals the good things like the natural face color and flush.
Choosing the right type and color of blush for your skin type and tone is an essential step to achieve the best look. Don’t get intimidated by the number of colors and shades on the beauty counter. As long as the color falls in the category of the shades that match your skin tone, it’ll look great, even if you’re not used to it at first.